


Endzone Camera Blog

Room Scanning Techniques for Property Documenta...
When walking into a home for the first time, the layout, lighting, and space tell a story. But trying to capture that same story for records, listings, or inspections can be tricky. That’s where room scanning comes in. It’s an easy way to document spaces from every angle so that you're not just describing a room—you’re showing it. In real estate and property management, room scans can help with marketing, insurance claims, renovation planning, and even dispute resolution. But accuracy matters. If corners are missed or walls appear distorted, the scan won’t truly reflect the space. That's why more people are turning to telescopic camera tripods. These tripods allow you to lift a camera several feet above eye level, giving you a clean, full-frame view of the room. This extra height helps prevent those strange tilted angles or blocked corners that often show up when shooting at ground level. Whether you're scanning open-concept living rooms or small studio apartments, a tall tripod can deliver footage that’s level, complete, and easier to review later. Benefits of Using Telescopic Camera Tripods for Room Scanning Room scanning is all about visuals that give full, clear coverage of a space. While handheld cameras or smaller tripods can work in a pinch, there are real advantages to using a telescopic camera tripod. Here are some key benefits: - Stability Handheld shots can be shaky and smaller tripods may not always stay secure. A telescopic camera tripod creates a firm setup that holds its position, resulting in cleaner lines with no motion blur. Once set, you won’t need to keep adjusting it throughout the scan. - Better viewpoints Elevating the camera improves your view of the room. You can capture the tops of furniture, avoid blocking corners, and get an accurate sense of layout without walls cutting off parts of the shot. - Easy to move around Most telescopic tripods are designed to be portable and simple to set up. That saves you time adjusting gear and lets you focus on capturing the room quickly, especially in tight or narrow hallways. - Works for various room sizes Whether you’re dealing with a space that has high ceilings or low beams, these adjustable tripods give you flexibility. Raise or lower them to suit the space and get the best angle for the shot. A solid tripod gives your camera a controlled, consistent base. Whether you’re documenting a grand entry or a half-bath, getting the height right makes everything easier to understand in the footage. Step-by-Step Guide to Room Scanning Techniques Great scans don’t just happen by hitting record. A few simple steps before and during filming can make a big difference in quality. Here’s a walkthrough to help guide your process: 1. Prep the room Clear anything that blocks major parts of the space—bags, small furniture, personal belongings. Open closet doors or adjoining rooms to let the space flow naturally. Let in as much natural light as possible to reduce dark areas. 2. Set up your telescopic camera tripod Find a corner for the initial wide shot and raise the camera to eye level or slightly above to avoid floor distortion. Make sure the tripod legs are level and the camera is mounted securely. 3. Capture panoramic shots Use a slow, even pan around the room—making a complete loop if possible. Keep movement steady to avoid blur or warped edges. If the space is oddly shaped, break up the scan into sections and stitch clips together. 4. Do a walkthrough for added detail Move the tripod to several other points in the room and record again. Zoom in on standout features like built-ins, fireplaces, or any appliances worth noting. If floor texture or ceiling height matters, get those too. The key to a helpful scan is showing how the room looks and flows in real life. Done right, these scans allow people to walk through a space virtually, which is useful when properties are being rented, sold, or analyzed for future work. Tips for Enhancing Scans with Telescopic Camera Tripods Even small adjustments can step up your scan quality. Good footage is clear, well-lit, and balanced. The following tips help get you there: - Use even lighting Whenever possible, shoot during the day with natural light coming in. If you’re filming after dark or in low-light areas, use soft lighting positioned around the room to cut shadows without overexposing the space. Avoid pointing lights directly behind or at the camera. - Keep the tripod steady Stability is key. Make sure all legs are locked and set on a flat surface. If you’re on uneven flooring, use adjustable leg heights or add padding under one leg to level the tripod. - Scan big or awkward rooms in sections If one corner isn't enough, do multiple scans from different angles. Think of it like putting together different pieces of the same puzzle. This makes the whole space easier to understand through the footage. Quick checklist for sharper scans: - Light the room with natural or soft light- Double-check tripod levels and camera tilt- Clean the camera lens before every use- Scan from several positions if the room is large- Pause and reset between angles to avoid motion blur These steps don’t take long but they go a long way. High-angle shots that are clear and steady help show the full potential of a space, even if someone is viewing it for the first time on a screen. Common Challenges and How to Overcome Them Scanning rooms sounds simple, but it’s not always smooth sailing. Tight spaces, bulky furniture, and unusual layouts can all get in the way. Knowing what to expect can help minimize slowdowns. A common issue is limited space. In tight areas like closets, laundry rooms, or small bathrooms, there may not be room to open the tripod legs. When this happens, lower the tripod and position it just outside the doorway for a wider shot that still shows the layout. Obstacles like large furniture or weird room shapes can also create scanning headaches. Move small items temporarily to avoid blocking entryways or covering features. You don’t need to empty the room—just improve visibility. Matching the tripod angle between shots matters too. If you’re scanning the room in sections, keep the tripod height and tilt the same at each setup. Many tripods include markers or notches that help replicate previous camera positions. Don’t forget to monitor power and memory. Running low on battery or storage space halfway through a session can mean redoing part of the work if something’s missing later. Start fully charged, have backup batteries and cards, and check them between room setups. These challenges are easy to work through with a little planning. Flexibility and small adjustments let you get better scans with less hassle. Keeping Your Telescopic Camera Tripod in Top Condition A clean, working tripod makes your job easier and your scans more reliable. Just like any gear, a telescopic camera tripod works best when it’s looked after. Start with a quick pre-use check. Tighten all clamps and locks. Look for any cracked or bent legs and make sure your camera mounts securely. Address wobbles or slipping parts right away to avoid shaky footage. After each use, wipe away dirt or moisture. Shooting near windows or outside can let dust sneak into joints or locks. Store your tripod in a padded case to keep it safe between jobs. Reminders for keeping your tripod dependable: - Keep knobs and leg extensions clean- If any moving part sticks, lightly lubricate it- Store it somewhere dry and out of direct sunlight- Don’t stretch leg sections beyond marked limits- Avoid forcing any part—each piece should move smoothly If you use the tripod a lot, schedule monthly tune-ups. Inspect clamps, footpads, and leg sections so you can fix wear and tear before it affects your recordings. Why Reliable Room Scans Make a Big Difference Clear property scans make communication easier for landlords, managers, and buyers. A good recording reflects the real condition of a room—no missing corners or tilted frames. It’s more than just a backup. It’s how decisions get made on repairs, upgrades, or property value. Using a telescopic camera tripod raises the quality right from the start. You get stability, better angles, and smoother shots. When you pair that with simple scanning techniques, the result is reliable footage that helps everyone involved. And since good scans last long after the walkthrough is over, having the right setup means you’re ready for whatever comes next with each property. When you're ready to explore the benefits of clear, high-quality room scans, consider how a telescopic camera tripod can enhance your results. At Hi Rise Camera, we offer solutions that ensure every angle and detail is captured perfectly, making your work in real estate, education, or any field stand out. To find the right equipment for your needs, discover our full range of products and elevate your filming experience to new heights.
Room Scanning Techniques for Property Documentation
When walking into a home for the first time, the layout, lighting, and space tell a story. But trying to capture that same story for records, listings, or inspections can be tricky. That’s where room scanning comes in. It’s an easy way to document spaces from every angle so that you're not just describing a room—you’re showing it. In real estate and property management, room scans can help with marketing, insurance claims, renovation planning, and even dispute resolution. But accuracy matters. If corners are missed or walls appear distorted, the scan won’t truly reflect the space. That's why more people are turning to telescopic camera tripods. These tripods allow you to lift a camera several feet above eye level, giving you a clean, full-frame view of the room. This extra height helps prevent those strange tilted angles or blocked corners that often show up when shooting at ground level. Whether you're scanning open-concept living rooms or small studio apartments, a tall tripod can deliver footage that’s level, complete, and easier to review later. Benefits of Using Telescopic Camera Tripods for Room Scanning Room scanning is all about visuals that give full, clear coverage of a space. While handheld cameras or smaller tripods can work in a pinch, there are real advantages to using a telescopic camera tripod. Here are some key benefits: - Stability Handheld shots can be shaky and smaller tripods may not always stay secure. A telescopic camera tripod creates a firm setup that holds its position, resulting in cleaner lines with no motion blur. Once set, you won’t need to keep adjusting it throughout the scan. - Better viewpoints Elevating the camera improves your view of the room. You can capture the tops of furniture, avoid blocking corners, and get an accurate sense of layout without walls cutting off parts of the shot. - Easy to move around Most telescopic tripods are designed to be portable and simple to set up. That saves you time adjusting gear and lets you focus on capturing the room quickly, especially in tight or narrow hallways. - Works for various room sizes Whether you’re dealing with a space that has high ceilings or low beams, these adjustable tripods give you flexibility. Raise or lower them to suit the space and get the best angle for the shot. A solid tripod gives your camera a controlled, consistent base. Whether you’re documenting a grand entry or a half-bath, getting the height right makes everything easier to understand in the footage. Step-by-Step Guide to Room Scanning Techniques Great scans don’t just happen by hitting record. A few simple steps before and during filming can make a big difference in quality. Here’s a walkthrough to help guide your process: 1. Prep the room Clear anything that blocks major parts of the space—bags, small furniture, personal belongings. Open closet doors or adjoining rooms to let the space flow naturally. Let in as much natural light as possible to reduce dark areas. 2. Set up your telescopic camera tripod Find a corner for the initial wide shot and raise the camera to eye level or slightly above to avoid floor distortion. Make sure the tripod legs are level and the camera is mounted securely. 3. Capture panoramic shots Use a slow, even pan around the room—making a complete loop if possible. Keep movement steady to avoid blur or warped edges. If the space is oddly shaped, break up the scan into sections and stitch clips together. 4. Do a walkthrough for added detail Move the tripod to several other points in the room and record again. Zoom in on standout features like built-ins, fireplaces, or any appliances worth noting. If floor texture or ceiling height matters, get those too. The key to a helpful scan is showing how the room looks and flows in real life. Done right, these scans allow people to walk through a space virtually, which is useful when properties are being rented, sold, or analyzed for future work. Tips for Enhancing Scans with Telescopic Camera Tripods Even small adjustments can step up your scan quality. Good footage is clear, well-lit, and balanced. The following tips help get you there: - Use even lighting Whenever possible, shoot during the day with natural light coming in. If you’re filming after dark or in low-light areas, use soft lighting positioned around the room to cut shadows without overexposing the space. Avoid pointing lights directly behind or at the camera. - Keep the tripod steady Stability is key. Make sure all legs are locked and set on a flat surface. If you’re on uneven flooring, use adjustable leg heights or add padding under one leg to level the tripod. - Scan big or awkward rooms in sections If one corner isn't enough, do multiple scans from different angles. Think of it like putting together different pieces of the same puzzle. This makes the whole space easier to understand through the footage. Quick checklist for sharper scans: - Light the room with natural or soft light- Double-check tripod levels and camera tilt- Clean the camera lens before every use- Scan from several positions if the room is large- Pause and reset between angles to avoid motion blur These steps don’t take long but they go a long way. High-angle shots that are clear and steady help show the full potential of a space, even if someone is viewing it for the first time on a screen. Common Challenges and How to Overcome Them Scanning rooms sounds simple, but it’s not always smooth sailing. Tight spaces, bulky furniture, and unusual layouts can all get in the way. Knowing what to expect can help minimize slowdowns. A common issue is limited space. In tight areas like closets, laundry rooms, or small bathrooms, there may not be room to open the tripod legs. When this happens, lower the tripod and position it just outside the doorway for a wider shot that still shows the layout. Obstacles like large furniture or weird room shapes can also create scanning headaches. Move small items temporarily to avoid blocking entryways or covering features. You don’t need to empty the room—just improve visibility. Matching the tripod angle between shots matters too. If you’re scanning the room in sections, keep the tripod height and tilt the same at each setup. Many tripods include markers or notches that help replicate previous camera positions. Don’t forget to monitor power and memory. Running low on battery or storage space halfway through a session can mean redoing part of the work if something’s missing later. Start fully charged, have backup batteries and cards, and check them between room setups. These challenges are easy to work through with a little planning. Flexibility and small adjustments let you get better scans with less hassle. Keeping Your Telescopic Camera Tripod in Top Condition A clean, working tripod makes your job easier and your scans more reliable. Just like any gear, a telescopic camera tripod works best when it’s looked after. Start with a quick pre-use check. Tighten all clamps and locks. Look for any cracked or bent legs and make sure your camera mounts securely. Address wobbles or slipping parts right away to avoid shaky footage. After each use, wipe away dirt or moisture. Shooting near windows or outside can let dust sneak into joints or locks. Store your tripod in a padded case to keep it safe between jobs. Reminders for keeping your tripod dependable: - Keep knobs and leg extensions clean- If any moving part sticks, lightly lubricate it- Store it somewhere dry and out of direct sunlight- Don’t stretch leg sections beyond marked limits- Avoid forcing any part—each piece should move smoothly If you use the tripod a lot, schedule monthly tune-ups. Inspect clamps, footpads, and leg sections so you can fix wear and tear before it affects your recordings. Why Reliable Room Scans Make a Big Difference Clear property scans make communication easier for landlords, managers, and buyers. A good recording reflects the real condition of a room—no missing corners or tilted frames. It’s more than just a backup. It’s how decisions get made on repairs, upgrades, or property value. Using a telescopic camera tripod raises the quality right from the start. You get stability, better angles, and smoother shots. When you pair that with simple scanning techniques, the result is reliable footage that helps everyone involved. And since good scans last long after the walkthrough is over, having the right setup means you’re ready for whatever comes next with each property. When you're ready to explore the benefits of clear, high-quality room scans, consider how a telescopic camera tripod can enhance your results. At Hi Rise Camera, we offer solutions that ensure every angle and detail is captured perfectly, making your work in real estate, education, or any field stand out. To find the right equipment for your needs, discover our full range of products and elevate your filming experience to new heights.
Endzone Camera Blog

Transport Solutions for Tall Photography Equipment
Transporting tall photography equipment has its challenges. If you’ve ever tried packing up an extended tripod or a telescoping camera mast, you’ve probably run into issues like awkward shapes, limited storage space, or even worrying whether your gear will make it intact. The bulk and fragility of these tools add another layer of stress to your shooting schedule, especially when you're working across different locations. For professionals who rely on stable, elevated footage, treating gear with care doesn’t stop at using it properly. It includes how it’s packed, hauled, and stored. Whether you’re documenting a construction site, setting up at a hotel event, or capturing visuals for commercial property listings, safe and convenient transport plays a big part in delivering quality results. That’s why it helps to explore transport solutions that keep your tall equipment protected without making your setup harder to manage. Choosing the Right Transport Case Every situation calls for something a little different, especially when you’re balancing portability with protection. One day you might just need to carry your equipment from your car to a building, and the next, you’re checking it in at an airport. Picking the right transport case can save you time and reduce damage to your gear. These are two things no professional wants to leave to chance. There are a few main options to consider: - Hard cases: These are sturdy and great for high-impact protection. Good for flying or long-distance vehicle travel, especially when equipment is exposed to rough handling.- Soft bags: Lightweight and easier to carry, these are ideal for short trips or daily use, where you can keep an eye on your gear.- Hybrid cases: A mix of both, with rigid frames wrapped in soft exteriors. These offer some protection without sacrificing flexibility. Here’s what to look out for when deciding: 1. Padding: Make sure there’s enough cushioning to absorb bumps. Foam inserts that fit your gear shape are a smart choice.2. Durability: Materials like ballistic nylon or high-grade plastic can take scrapes and bumps during transport.3. Wheels and handles: If you're moving across long distances, strong wheels and telescoping handles will make your job easier. Smooth-rolling wheels reduce stress on your body.4. Interior compartments: Dividers and mesh pockets keep everything in place and prevent items from bumping into each other. Use cases depend on how and where you travel. For domestic flights, rolling hard cases that meet carry-on or checked luggage guidelines are more convenient. International travel usually requires stronger locks and moisture protection. If you’re commuting daily to job sites, a soft-roller or messenger-style case might be more suitable. It’s smaller, easier to load into compact spaces, and still protective enough for frequent use. A case that’s too awkward to carry or doesn’t hold up well under pressure will likely get ignored. Investing in the right transport setup now will improve every trip you make with your gear. Consistent performance depends on solid protection. Efficient Packing Techniques Once you’ve found the right case, how you pack your equipment really matters. Tossing everything in quickly might save time at first but could cost you later with damaged gear or disorganization at your shooting location. Start by breaking down your taller items like tripods or camera masts into their smallest transportable parts. Loosen and fold sections if your gear allows it. Keep smaller hardware like clamps, screws, and mounts tucked into labeled compartments or zippered pouches to avoid clutter or mixing them up. Here are a few simple tips to make packing smoother: - Place extended gear diagonally in long bags so it doesn’t press against or poke through edges.- Keep accessories organized in standalone pouches. Use color coding or labels so you don’t waste time digging through cables or connectors.- Pad delicate parts with foam dividers or small towels. This prevents small impacts from turning into big problems.- Take advantage of molded foam inserts or Velcro divider systems you can adjust as your gear changes. Keeping item placement consistent from one job to the next also helps you find whatever you need faster. Place your camera body, batteries, chargers, cables, and lens-cleaning tools in the same spots each time. That kind of familiarity is a big help when you’re hustling to catch setup windows. Label your transport cases with your name or company info and add a tag listing what gear is inside. It saves time when double-checking your packouts and helps you avoid leaving anything behind. With a little routine and care, packing tall photography equipment gets quicker, cleaner, and a whole lot easier. Methods for Easy Transport Once you’ve got protection and packing sorted, the next step is figuring out how to move everything around without wearing yourself out. Whether walking long distances at convention halls or shifting through narrow real estate properties, mobility makes a difference. Rolling cases are ideal for most setups. They offer a sturdy foundation for tripods, masts, extension poles, and all your supporting gear. Three things make rolling systems worth it: strong wheels, reliable handles, and balance. If the case can manage curbs, elevator gaps, and bumpy parking lots without tipping, you’re in good shape. For shorter trips or when stairs are unavoidable, backpacks or shoulder bags can work well. Just make sure you pack smartly to avoid strain. Place heavier items close to your back, and layer gear so that weight is spread out evenly. Some more helpful tips for gear transport: - Divide gear into lightweight bags when space is tight or stairs are unavoidable- Use rolling cases on smooth paths or flat surfaces- Mix your carrying methods with hybrid gear bags that switch between wheels and straps- Plan your load-in and load-out route ahead of time. Familiarize yourself with access points like ramps or service elevators- Keep small items like screws, mounts, or sensors clipped to your belt or in a pocket case A camera professional juggling three hospitality shoots in one day doesn’t need added hassle. Being able to roll a case through tight hotel floors or slide through a construction site alley without backtracking saves time and energy. Carrying tall gear doesn’t have to feel like dragging luggage through an airport. Smart planning and the right case setup make all the difference. Maintenance and Checklists Proper transport gear works best when it’s reliable. If parts wear out or pads fall apart, all that planning won’t count for much. Regular upkeep can help your gear do its job longer, and it starts with a quick inspection. Every time you finish a shoot, check the following: 1. Are hinges, clamps, and locks working smoothly?2. Are your wheels free of pebbles or collecting debris?3. Do compartments close securely without fighting the zipper or latch?4. Are there frays or cracks forming near high-stress areas?5. Are your dividers or foam inserts clean and shaped right? Simple cleaning keeps your gear in top shape, too. Use a soft brush or cloth to get rid of dust and dirt on both the gear and your case. If stuff’s been exposed to moisture, open cases up after each trip and air them out to prevent mildew. Make a routine checklist to use before you leave for a job and after you return: - Check tripod and pole locks- Secure all mounts, bolts, and plates- Charge and pack batteries and cables- Wipe down contact points and surfaces- Make sure all tools or fasteners are in their designated spots If your case design has removable liners, wash them as needed. A case that smells like mildew or collects gravel isn’t one you’ll be excited to use. Rotate cleaning days based on how often you haul your setup. The more you travel, the more often you’ll want to give it care. The smoother your maintenance rhythm, the less stress you’ll face when setting up for your next shoot. Getting Set Up Without Slowing Down Keeping your tall equipment safe from damage is only part of the equation. A good setup also helps you access things fast, manage changes on the fly, and clear out without dragging around extra steps. Tight straps, snug compartments, and padded edges keep your gear stable while moving. But those same design details should help you work faster, not just stay protected. Organize your case so your go-to items are easy to reach from the top or outside flaps. That might be your main camera body, power cables, or monitor mounts. Look for transport systems that let you compartmentalize without stacking everything four deep. Flap designs and modular internal layouts can boost your speed without adding bulk. Some pros make small custom pouches for batteries or popular mounts so they can grab and go without unpacking the whole kit. The more time you spend messing with tangled cords or digging for a key item, the more likely you are to miss part of your setup window. Having a layout that works for you is worth revisiting and refining. The right transport solution doesn’t just prevent drops or fumbles. It helps keep you in control and your work on schedule. Moving your tall photography gear around should never feel like a burden. With smart case choices, careful packing, steady maintenance, and strategic access in mind, your equipment becomes something you work with—not against. When you're ready to make moving your gear easier without sacrificing protection, take a look at the transport tools available from Hi Rise Camera. Our lineup is built to handle demanding environments, and the professional tall tripod provides the stability you need for elevated, steady shots, no matter the setting. Explore how our options can support your next project with less hassle.
Transport Solutions for Tall Photography Equipment
Transporting tall photography equipment has its challenges. If you’ve ever tried packing up an extended tripod or a telescoping camera mast, you’ve probably run into issues like awkward shapes, limited storage space, or even worrying whether your gear will make it intact. The bulk and fragility of these tools add another layer of stress to your shooting schedule, especially when you're working across different locations. For professionals who rely on stable, elevated footage, treating gear with care doesn’t stop at using it properly. It includes how it’s packed, hauled, and stored. Whether you’re documenting a construction site, setting up at a hotel event, or capturing visuals for commercial property listings, safe and convenient transport plays a big part in delivering quality results. That’s why it helps to explore transport solutions that keep your tall equipment protected without making your setup harder to manage. Choosing the Right Transport Case Every situation calls for something a little different, especially when you’re balancing portability with protection. One day you might just need to carry your equipment from your car to a building, and the next, you’re checking it in at an airport. Picking the right transport case can save you time and reduce damage to your gear. These are two things no professional wants to leave to chance. There are a few main options to consider: - Hard cases: These are sturdy and great for high-impact protection. Good for flying or long-distance vehicle travel, especially when equipment is exposed to rough handling.- Soft bags: Lightweight and easier to carry, these are ideal for short trips or daily use, where you can keep an eye on your gear.- Hybrid cases: A mix of both, with rigid frames wrapped in soft exteriors. These offer some protection without sacrificing flexibility. Here’s what to look out for when deciding: 1. Padding: Make sure there’s enough cushioning to absorb bumps. Foam inserts that fit your gear shape are a smart choice.2. Durability: Materials like ballistic nylon or high-grade plastic can take scrapes and bumps during transport.3. Wheels and handles: If you're moving across long distances, strong wheels and telescoping handles will make your job easier. Smooth-rolling wheels reduce stress on your body.4. Interior compartments: Dividers and mesh pockets keep everything in place and prevent items from bumping into each other. Use cases depend on how and where you travel. For domestic flights, rolling hard cases that meet carry-on or checked luggage guidelines are more convenient. International travel usually requires stronger locks and moisture protection. If you’re commuting daily to job sites, a soft-roller or messenger-style case might be more suitable. It’s smaller, easier to load into compact spaces, and still protective enough for frequent use. A case that’s too awkward to carry or doesn’t hold up well under pressure will likely get ignored. Investing in the right transport setup now will improve every trip you make with your gear. Consistent performance depends on solid protection. Efficient Packing Techniques Once you’ve found the right case, how you pack your equipment really matters. Tossing everything in quickly might save time at first but could cost you later with damaged gear or disorganization at your shooting location. Start by breaking down your taller items like tripods or camera masts into their smallest transportable parts. Loosen and fold sections if your gear allows it. Keep smaller hardware like clamps, screws, and mounts tucked into labeled compartments or zippered pouches to avoid clutter or mixing them up. Here are a few simple tips to make packing smoother: - Place extended gear diagonally in long bags so it doesn’t press against or poke through edges.- Keep accessories organized in standalone pouches. Use color coding or labels so you don’t waste time digging through cables or connectors.- Pad delicate parts with foam dividers or small towels. This prevents small impacts from turning into big problems.- Take advantage of molded foam inserts or Velcro divider systems you can adjust as your gear changes. Keeping item placement consistent from one job to the next also helps you find whatever you need faster. Place your camera body, batteries, chargers, cables, and lens-cleaning tools in the same spots each time. That kind of familiarity is a big help when you’re hustling to catch setup windows. Label your transport cases with your name or company info and add a tag listing what gear is inside. It saves time when double-checking your packouts and helps you avoid leaving anything behind. With a little routine and care, packing tall photography equipment gets quicker, cleaner, and a whole lot easier. Methods for Easy Transport Once you’ve got protection and packing sorted, the next step is figuring out how to move everything around without wearing yourself out. Whether walking long distances at convention halls or shifting through narrow real estate properties, mobility makes a difference. Rolling cases are ideal for most setups. They offer a sturdy foundation for tripods, masts, extension poles, and all your supporting gear. Three things make rolling systems worth it: strong wheels, reliable handles, and balance. If the case can manage curbs, elevator gaps, and bumpy parking lots without tipping, you’re in good shape. For shorter trips or when stairs are unavoidable, backpacks or shoulder bags can work well. Just make sure you pack smartly to avoid strain. Place heavier items close to your back, and layer gear so that weight is spread out evenly. Some more helpful tips for gear transport: - Divide gear into lightweight bags when space is tight or stairs are unavoidable- Use rolling cases on smooth paths or flat surfaces- Mix your carrying methods with hybrid gear bags that switch between wheels and straps- Plan your load-in and load-out route ahead of time. Familiarize yourself with access points like ramps or service elevators- Keep small items like screws, mounts, or sensors clipped to your belt or in a pocket case A camera professional juggling three hospitality shoots in one day doesn’t need added hassle. Being able to roll a case through tight hotel floors or slide through a construction site alley without backtracking saves time and energy. Carrying tall gear doesn’t have to feel like dragging luggage through an airport. Smart planning and the right case setup make all the difference. Maintenance and Checklists Proper transport gear works best when it’s reliable. If parts wear out or pads fall apart, all that planning won’t count for much. Regular upkeep can help your gear do its job longer, and it starts with a quick inspection. Every time you finish a shoot, check the following: 1. Are hinges, clamps, and locks working smoothly?2. Are your wheels free of pebbles or collecting debris?3. Do compartments close securely without fighting the zipper or latch?4. Are there frays or cracks forming near high-stress areas?5. Are your dividers or foam inserts clean and shaped right? Simple cleaning keeps your gear in top shape, too. Use a soft brush or cloth to get rid of dust and dirt on both the gear and your case. If stuff’s been exposed to moisture, open cases up after each trip and air them out to prevent mildew. Make a routine checklist to use before you leave for a job and after you return: - Check tripod and pole locks- Secure all mounts, bolts, and plates- Charge and pack batteries and cables- Wipe down contact points and surfaces- Make sure all tools or fasteners are in their designated spots If your case design has removable liners, wash them as needed. A case that smells like mildew or collects gravel isn’t one you’ll be excited to use. Rotate cleaning days based on how often you haul your setup. The more you travel, the more often you’ll want to give it care. The smoother your maintenance rhythm, the less stress you’ll face when setting up for your next shoot. Getting Set Up Without Slowing Down Keeping your tall equipment safe from damage is only part of the equation. A good setup also helps you access things fast, manage changes on the fly, and clear out without dragging around extra steps. Tight straps, snug compartments, and padded edges keep your gear stable while moving. But those same design details should help you work faster, not just stay protected. Organize your case so your go-to items are easy to reach from the top or outside flaps. That might be your main camera body, power cables, or monitor mounts. Look for transport systems that let you compartmentalize without stacking everything four deep. Flap designs and modular internal layouts can boost your speed without adding bulk. Some pros make small custom pouches for batteries or popular mounts so they can grab and go without unpacking the whole kit. The more time you spend messing with tangled cords or digging for a key item, the more likely you are to miss part of your setup window. Having a layout that works for you is worth revisiting and refining. The right transport solution doesn’t just prevent drops or fumbles. It helps keep you in control and your work on schedule. Moving your tall photography gear around should never feel like a burden. With smart case choices, careful packing, steady maintenance, and strategic access in mind, your equipment becomes something you work with—not against. When you're ready to make moving your gear easier without sacrificing protection, take a look at the transport tools available from Hi Rise Camera. Our lineup is built to handle demanding environments, and the professional tall tripod provides the stability you need for elevated, steady shots, no matter the setting. Explore how our options can support your next project with less hassle.
Endzone Camera Blog

Reducing Camera Shake in Mobile Documentation
Shaky video can ruin documentary footage, especially when you're trying to capture clean visuals while moving through a space. Whether you're walking through a construction site, showcasing a new apartment unit, or filming a live event, the last thing you want is footage that feels bumpy or unstable. Even slight movement can make video hard to follow or look unprofessional. And if you're working on a project where clarity matters, consistent shake can make the job harder once you’re reviewing clips or showing them to others. Getting smoother, steadier shots doesn’t mean you need a full camera crew. With the right tools and a few simple habits, you can reduce camera shake and get better footage on the go. One easy and efficient way to solve this issue is using a monopod. It offers extra support while keeping your setup lightweight. Along with that, paying attention to how you hold your gear and how you move can also make a huge difference. Let’s break down what causes camera shake and the steps you can take to fight it. Understanding Camera Shake Camera shake happens when your hands or equipment move in ways the camera can’t fully adjust to while filming. This is most noticeable when walking, changing angles quickly, or using long zoom lenses. Even a slight tremble can be picked up through the lens, especially in HD or 4K videos. What you end up with is footage that looks jittery or unstable, even if everything else around you is steady. The key reasons behind camera shake come down to: - Handheld filming with no support- Fast panning or tilting- Extended zoom range or heavy lenses- Uneven ground or sudden body movements- Wind gusts, especially when filming in open or elevated areas If you're documenting progress at a job site, those quick steps across gravel or dirt can cause shifts. If you're walking through an apartment hallway with your camera in hand, turning corners or going up stairs can throw things off. In places where there's a lot of stop-and-go movement, camera shake becomes more noticeable. It's not just a cosmetic issue either. When footage is unstable, it becomes harder to focus on details. Viewers may feel distracted or even uncomfortable. That’s a concern when you're showcasing work, verifying progress, or trying to capture a scene where movement just wasn’t part of the plan. Benefits Of Using A Monopod A monopod is a smart solution if you're moving around but still want some extra balance. Unlike a tripod, which takes up more space and can be tricky to reposition quickly, a monopod has a single leg and is easy to carry. It gives your camera a support point without locking it in place, which is helpful during walkthroughs or live setups. Here’s why a monopod works so well when you're trying to cut down on camera shake: 1. Stability Without Bulk A monopod keeps your camera centered and helps reduce the sway that naturally happens when holding a camera in your hands. You don’t have to carry around a full rig to get better balance. 2. Quick Setup and Breakdown If you’re on a fast-moving job site or covering parts of an outdoor event, you want to stay light and mobile. A monopod gives you enough support without slowing you down. You can adjust the height in seconds, and packing it back up is usually just a matter of collapsing the pole. 3. Improved Control for Tilts and Pans Because your camera has a fixed touchpoint with the ground, moves feel more controlled. Tilting or doing light pans becomes easier to handle, and the final video output tends to look much smoother than handheld attempts. 4. Portable Fit for Tight Spaces If you’re filming in areas like narrow hallways or crowded setups, monopods take up less room. They're easier to maneuver in small spaces compared to tripods, which need all three legs planted. Many people also find monopods easier to hold for long sessions. Holding a camera in your hands for extended periods can wear you down, which adds to camera shake later in the day. Using a monopod reduces that strain and makes longer shoots more manageable. A great use-case is during a building walkthrough. You’re following a contractor or client from room to room, moving quickly and trying to capture every angle before people start clearing out. That’s when a monopod becomes your best tool for filming without too much workflow interruption. Additional Tips To Reduce Camera Shake Even with a monopod, how you move and carry your camera still makes a big difference in producing smooth footage. A lot of shake comes down to body movement. With a few adjustments to your grip and posture, you can keep your video cleaner even when you're walking or filming from tight angles. Start by keeping your elbows tucked in toward your body. This naturally creates a steadier base and limits arm swing. Next, avoid putting all your weight on one leg when standing still. Keeping your weight balanced lets the monopod do its job without slanting or making the footage tilt. Here are a few more practical tips that help when you're working on the go: - Walk with soft, even steps when filming while moving. Think of how you'd walk across a wooden floor quietly. Take your time.- Use your non-dominant hand to keep light tension on the monopod shaft. That added touch of control helps improve balance.- Let the monopod rest on your shoulder when you're between shots to cut down on fatigue and reduce hand slips.- If you're filming outside, avoid standing on uneven ground unless you can find some flat rocks or solid spots to brace yourself. Also, take advantage of built-in features your camera might already have. Many devices include image stabilization settings, which help cancel out slight motion. While it won't fully fix large jerks or bounces, it definitely smooths over smaller shakes. Just check your camera settings before shooting to make sure it’s turned on. Practicing these small changes without rushing, using your body to stay balanced, and leaning into the natural swing of movement helps build a workflow that consistently gives you better shots. Once those parts become routine, your monopod becomes even more effective. Techniques For Different Scenarios Every setting brings a different challenge when it comes to camera shake. The way you move when showing an empty house is totally different from documenting a noisy construction site or filming a guest speaker at a private event. Here’s a breakdown of what to focus on in specific types of settings: 1. Real Estate Walkthroughs Footage needs to feel smooth and inviting. When filming room by room, keep a steady pace and pan gently. Use the monopod like an anchor and tilt softly from the waist for wider reveals. Try to walk parallel to the layout of the building rather than taking sharp diagonal turns. If you're capturing the outdoors, like a deck or garden, plant your feet and rotate slowly for smoother sweeps. 2. Construction Documentation You’re usually dealing with uneven surfaces, noise, and movement from workers and machines. Stick to clear paths and avoid walking while recording whenever possible. Instead, pause at key checkpoints and pan the camera slowly. Use the monopod as a steady post to lean into for those longer views down corridors or crane shots of frameworks. Keep an eye on how lighting might cause glare off steel or glass surfaces. Those moments benefit from steady angles. 3. Event Coverage Filming during live events like conferences, ribbon cuts, or product launches requires a balance of movement and patience. Stick to zones where you won’t disrupt foot traffic but still have a clear shot. If speakers are on stage, aim for wide, elevated angles with minimal motion and avoid fast zooms. Use your monopod as a stand-in tripod when previewing moments, like crowd reactions or guest panels. 4. Classroom or Educational Videos Lively classroom settings mix motion and detail. You might need to swing from a whiteboard shot to a student speaking in the back. In these setups, use the monopod’s height to shoot over heads. Movement should be limited to slow pans. If it's a lab or workshop session, lock in a location ahead of time and let the action come to the lens. Each situation calls for a different rhythm. The key is knowing when to move and when to let your shot breathe. Matching your movement to the pace of what you're filming will keep the footage cleaner and more watchable. Enhancing Your Filming Setup Stability starts with the monopod, but rounding out your setup always helps. Adding small pieces of gear makes a big change in final footage and can be adjusted depending on the project. A few useful upgrades include: - External microphones to keep audio steady when the camera’s moving- LED light panels you can attach during indoor or low-light recordings- Shoulder straps or harnesses that give better control when switching locations- Dust covers or rain sleeves if you’re heading outdoors in tricky conditions Also, doing regular checks on your gear before filming keeps everything ready to go. Double-check the locks and clamps on your monopod. They might loosen over time, especially if you're using it a lot. Look over your mounting plate to make sure there’s no wiggle when the camera is attached. Once you’ve built your setup and practiced with the gear, you’ll start moving more confidently. Learning where your boundaries are, how far you can tilt, how quickly you can pan, and whether you can walk and film at the same time comes through hands-on experience. That skill makes a big impact on your results. It’s smart to experiment with different positions before the real footage starts. Find five or six go-to angles for each type of job so that you’re not guessing on shoot day. Having those prepped in your head keeps you flexible while still getting reliable results. Making Your Shots Count Smooth footage doesn’t come down to expensive gear alone. It’s a mix of preparation, smart movement, and reliable support. Reducing camera shake helps you focus on the story you’re trying to tell, whether it’s a timeline of progress for a contractor or a guided tour through an updated guest suite. Using monopods and adjusting your filming style brings more control into your hands. You’re not fighting the camera. You’re working with it. The difference is clear in the footage. It feels more focused, easier to follow, and ready for sharing or reviewing without edits that eat up hours. Whether you're covering property inspections or classroom lessons, clear and steady footage carries your message better than anything else. With a dependable setup and practiced technique, your shots hold attention longer and show a more complete story from start to finish. Using a monopod is a great way to achieve stable and clear footage in any setting, from real estate tours to educational environments. For more ideas on how to get the most out of your setup, explore the full lineup of gear that supports creative professionals and field work alike. Hi Rise Camera is here to support you in capturing those important moments with precision and ease.
Reducing Camera Shake in Mobile Documentation
Shaky video can ruin documentary footage, especially when you're trying to capture clean visuals while moving through a space. Whether you're walking through a construction site, showcasing a new apartment unit, or filming a live event, the last thing you want is footage that feels bumpy or unstable. Even slight movement can make video hard to follow or look unprofessional. And if you're working on a project where clarity matters, consistent shake can make the job harder once you’re reviewing clips or showing them to others. Getting smoother, steadier shots doesn’t mean you need a full camera crew. With the right tools and a few simple habits, you can reduce camera shake and get better footage on the go. One easy and efficient way to solve this issue is using a monopod. It offers extra support while keeping your setup lightweight. Along with that, paying attention to how you hold your gear and how you move can also make a huge difference. Let’s break down what causes camera shake and the steps you can take to fight it. Understanding Camera Shake Camera shake happens when your hands or equipment move in ways the camera can’t fully adjust to while filming. This is most noticeable when walking, changing angles quickly, or using long zoom lenses. Even a slight tremble can be picked up through the lens, especially in HD or 4K videos. What you end up with is footage that looks jittery or unstable, even if everything else around you is steady. The key reasons behind camera shake come down to: - Handheld filming with no support- Fast panning or tilting- Extended zoom range or heavy lenses- Uneven ground or sudden body movements- Wind gusts, especially when filming in open or elevated areas If you're documenting progress at a job site, those quick steps across gravel or dirt can cause shifts. If you're walking through an apartment hallway with your camera in hand, turning corners or going up stairs can throw things off. In places where there's a lot of stop-and-go movement, camera shake becomes more noticeable. It's not just a cosmetic issue either. When footage is unstable, it becomes harder to focus on details. Viewers may feel distracted or even uncomfortable. That’s a concern when you're showcasing work, verifying progress, or trying to capture a scene where movement just wasn’t part of the plan. Benefits Of Using A Monopod A monopod is a smart solution if you're moving around but still want some extra balance. Unlike a tripod, which takes up more space and can be tricky to reposition quickly, a monopod has a single leg and is easy to carry. It gives your camera a support point without locking it in place, which is helpful during walkthroughs or live setups. Here’s why a monopod works so well when you're trying to cut down on camera shake: 1. Stability Without Bulk A monopod keeps your camera centered and helps reduce the sway that naturally happens when holding a camera in your hands. You don’t have to carry around a full rig to get better balance. 2. Quick Setup and Breakdown If you’re on a fast-moving job site or covering parts of an outdoor event, you want to stay light and mobile. A monopod gives you enough support without slowing you down. You can adjust the height in seconds, and packing it back up is usually just a matter of collapsing the pole. 3. Improved Control for Tilts and Pans Because your camera has a fixed touchpoint with the ground, moves feel more controlled. Tilting or doing light pans becomes easier to handle, and the final video output tends to look much smoother than handheld attempts. 4. Portable Fit for Tight Spaces If you’re filming in areas like narrow hallways or crowded setups, monopods take up less room. They're easier to maneuver in small spaces compared to tripods, which need all three legs planted. Many people also find monopods easier to hold for long sessions. Holding a camera in your hands for extended periods can wear you down, which adds to camera shake later in the day. Using a monopod reduces that strain and makes longer shoots more manageable. A great use-case is during a building walkthrough. You’re following a contractor or client from room to room, moving quickly and trying to capture every angle before people start clearing out. That’s when a monopod becomes your best tool for filming without too much workflow interruption. Additional Tips To Reduce Camera Shake Even with a monopod, how you move and carry your camera still makes a big difference in producing smooth footage. A lot of shake comes down to body movement. With a few adjustments to your grip and posture, you can keep your video cleaner even when you're walking or filming from tight angles. Start by keeping your elbows tucked in toward your body. This naturally creates a steadier base and limits arm swing. Next, avoid putting all your weight on one leg when standing still. Keeping your weight balanced lets the monopod do its job without slanting or making the footage tilt. Here are a few more practical tips that help when you're working on the go: - Walk with soft, even steps when filming while moving. Think of how you'd walk across a wooden floor quietly. Take your time.- Use your non-dominant hand to keep light tension on the monopod shaft. That added touch of control helps improve balance.- Let the monopod rest on your shoulder when you're between shots to cut down on fatigue and reduce hand slips.- If you're filming outside, avoid standing on uneven ground unless you can find some flat rocks or solid spots to brace yourself. Also, take advantage of built-in features your camera might already have. Many devices include image stabilization settings, which help cancel out slight motion. While it won't fully fix large jerks or bounces, it definitely smooths over smaller shakes. Just check your camera settings before shooting to make sure it’s turned on. Practicing these small changes without rushing, using your body to stay balanced, and leaning into the natural swing of movement helps build a workflow that consistently gives you better shots. Once those parts become routine, your monopod becomes even more effective. Techniques For Different Scenarios Every setting brings a different challenge when it comes to camera shake. The way you move when showing an empty house is totally different from documenting a noisy construction site or filming a guest speaker at a private event. Here’s a breakdown of what to focus on in specific types of settings: 1. Real Estate Walkthroughs Footage needs to feel smooth and inviting. When filming room by room, keep a steady pace and pan gently. Use the monopod like an anchor and tilt softly from the waist for wider reveals. Try to walk parallel to the layout of the building rather than taking sharp diagonal turns. If you're capturing the outdoors, like a deck or garden, plant your feet and rotate slowly for smoother sweeps. 2. Construction Documentation You’re usually dealing with uneven surfaces, noise, and movement from workers and machines. Stick to clear paths and avoid walking while recording whenever possible. Instead, pause at key checkpoints and pan the camera slowly. Use the monopod as a steady post to lean into for those longer views down corridors or crane shots of frameworks. Keep an eye on how lighting might cause glare off steel or glass surfaces. Those moments benefit from steady angles. 3. Event Coverage Filming during live events like conferences, ribbon cuts, or product launches requires a balance of movement and patience. Stick to zones where you won’t disrupt foot traffic but still have a clear shot. If speakers are on stage, aim for wide, elevated angles with minimal motion and avoid fast zooms. Use your monopod as a stand-in tripod when previewing moments, like crowd reactions or guest panels. 4. Classroom or Educational Videos Lively classroom settings mix motion and detail. You might need to swing from a whiteboard shot to a student speaking in the back. In these setups, use the monopod’s height to shoot over heads. Movement should be limited to slow pans. If it's a lab or workshop session, lock in a location ahead of time and let the action come to the lens. Each situation calls for a different rhythm. The key is knowing when to move and when to let your shot breathe. Matching your movement to the pace of what you're filming will keep the footage cleaner and more watchable. Enhancing Your Filming Setup Stability starts with the monopod, but rounding out your setup always helps. Adding small pieces of gear makes a big change in final footage and can be adjusted depending on the project. A few useful upgrades include: - External microphones to keep audio steady when the camera’s moving- LED light panels you can attach during indoor or low-light recordings- Shoulder straps or harnesses that give better control when switching locations- Dust covers or rain sleeves if you’re heading outdoors in tricky conditions Also, doing regular checks on your gear before filming keeps everything ready to go. Double-check the locks and clamps on your monopod. They might loosen over time, especially if you're using it a lot. Look over your mounting plate to make sure there’s no wiggle when the camera is attached. Once you’ve built your setup and practiced with the gear, you’ll start moving more confidently. Learning where your boundaries are, how far you can tilt, how quickly you can pan, and whether you can walk and film at the same time comes through hands-on experience. That skill makes a big impact on your results. It’s smart to experiment with different positions before the real footage starts. Find five or six go-to angles for each type of job so that you’re not guessing on shoot day. Having those prepped in your head keeps you flexible while still getting reliable results. Making Your Shots Count Smooth footage doesn’t come down to expensive gear alone. It’s a mix of preparation, smart movement, and reliable support. Reducing camera shake helps you focus on the story you’re trying to tell, whether it’s a timeline of progress for a contractor or a guided tour through an updated guest suite. Using monopods and adjusting your filming style brings more control into your hands. You’re not fighting the camera. You’re working with it. The difference is clear in the footage. It feels more focused, easier to follow, and ready for sharing or reviewing without edits that eat up hours. Whether you're covering property inspections or classroom lessons, clear and steady footage carries your message better than anything else. With a dependable setup and practiced technique, your shots hold attention longer and show a more complete story from start to finish. Using a monopod is a great way to achieve stable and clear footage in any setting, from real estate tours to educational environments. For more ideas on how to get the most out of your setup, explore the full lineup of gear that supports creative professionals and field work alike. Hi Rise Camera is here to support you in capturing those important moments with precision and ease.
Endzone Camera Blog
Maintaining Clear Shots During Rainy Game Days
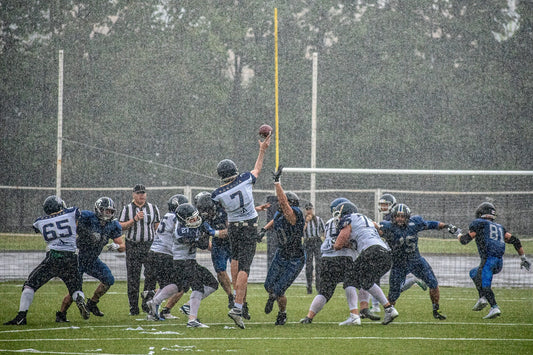
Rainy game days throw a whole new challenge into the mix for those trying to capture clean, clear video footage. While a steady drizzle might not stop the action on the field, it can create real problems behind the camera. Rain affects visibility, focus, and lens clarity, which means all that effort to record the game can go to waste if water spots or fog start clouding the view. Football end zone cameras are designed to capture wide, elevated angles that give a better view of plays as they unfold. But when the weather turns, even the best camera setups need extra care. Whether you're filming high school teams, practice sessions, or weekend games, managing your camera and keeping the shot clear matters just as much as what's happening on the field. Rain doesn’t care about your schedule, so preparing ahead for wet conditions can save you headaches later. Understanding The Problem: Rainy Game Days Outdoor filming during fall brings on more than wind and cold. It’s also the season when unexpected rain can show up fast, right in the middle of your setup. What starts off as a light mist can turn into steady rain that blurs images, fogs lenses, and makes footage look messy. That means missed plays, lost angles, and unclear visuals when you go back to review the game. When filming with a football end zone camera, you're often dealing with zoom lenses and wide coverage. Even tiny water droplets on the lens can distort the image or blur motion. Fogged-up viewfinders and soaked housings don’t just mess with quality, they make it hard to keep up with fast-moving gameplay. And since the towers usually stand taller than you can reach without adjusting the entire frame, it helps to plan ahead. Common rain-related issues include: - Fogged lenses from temperature differences or moisture buildup- Water spots that distort image clarity or create glare- Raindrops pooling on lens covers or shields- Reduced visibility from poor lighting or heavy clouds One weekend, a youth football tournament ran into steady rain just before kickoff. The gear wasn’t fully covered, and after the first quarter, the lens was fogged over. The footage pulled from that game later was almost useless. You could see shapes, but not details. The team missed out on reviewing play positioning, and the parents didn’t get the clips they'd hoped to share. That kind of problem, once it happens, is hard to fix in editing. Working in unpredictable weather comes with added pressure, especially when recording long segments. If you wait until the rain starts to think about your setup, it’s usually too late. Thinking through what could go wrong and tackling that ahead of time makes a big difference. Essential Equipment For Rainy Conditions Having the right gear matters more when weather shifts quickly. A good end zone camera setup should already be designed to hold up outdoors, but when rain is in the forecast, you’ll want extra layers of protection. Water and optics don’t mix well. Your goal is to keep the lens dry, the camera body protected, and the footage as smooth as possible no matter what. Let’s look at a few key add-ons and features you’ll want: 1. Weather-Resistant Housing Cameras that sit up high are more exposed to wind and straight rainfall. A weather-resistant outer shell keeps water from reaching buttons, panels, or ports that could short out. Solid housings that fit tightly around your camera and offer proper airflow can also reduce fogging. 2. Clear Plastic Covers or Rain Shields These are helpful when placed over the lens area. A clear shield can block raindrops while still capturing clean video, and some designs include small hoods or angles to guide water away from the front of the lens. 3. Water-Repellent Lens Coatings Some lenses or filters come with water-repellent coatings already applied. They help cause rain droplets to slide off instead of sticking, which means fewer watermarks in the shot. These are useful for quick cleanup and can also reduce glare or cloudiness from moisture. 4. Waterproof Bags or Wraps Spare wraps and zippered covers are worth having on hand between games or during setup and breakdown. Even if your camera is weather-resistant, your hands, control devices, and supporting gear can benefit from extra coverage. Instead of scrambling with a towel when rain starts, it's better to have layers in place from the beginning. That way, your gear can focus on doing what it’s supposed to do, capturing every snap and movement from a sharp, elevated view. The fewer distractions and adjustments you need, the more consistent your footage will be, even with clouds hanging overhead. Tips For Maintaining Clear Shots When filming in damp conditions, it’s not just about having the right equipment. It’s how you use it that really makes the difference. The way the camera is set up, maintained during the game, and handled between quarters plays a big part in capturing usable footage. Simple actions at the right time can save hours of frustration later. Start with setup. Elevate the camera securely so that you can minimize unnecessary exposure to splashback from sideline puddles or crowded areas. It helps to tilt the lens slightly downward. This angle keeps raindrops from sitting directly on the lens and can cut down on the chances of fog building up from the inside. If your lens is exposed, think about using a rubber lens hood to act as a mini umbrella. It’s a small addition, but it guides water away with a lot less effort. During games, make it a habit to check the lens every time there’s a break in play. A quick look can usually tell you if there’s moisture buildup. Keep a microfiber cloth in a resealable pouch for safe, dry wiping. The cloth shouldn’t leave lint behind, and it won’t scratch your gear, even if you’re working fast. If your setup includes a monitor or wireless screen, keep that clean too. Being able to track the video quality in real-time gives you the chance to fix a problem before it turns into a full shot of cloudy blur. Wet hands and camera controls also don’t mix. Disposable gloves with grip or fingerless waterproof options can help you keep clicking and adjusting, even when the conditions are messy. For longer shoots like construction progress updates or extended school events, keeping moisture in check becomes something you plan into the whole timeline. Whether you're filming a sideline game or surveying a property development, these habits apply across the board and can give you cleaner, sharper end results. Effective Practices For Monitoring And Adjusting Staying alert during the recording process helps avoid surprises when you review the footage later. What worked at the start of the game might not hold up an hour in if the weather starts shifting. That’s where monitoring and quick adjustment can help you stay a step ahead of problems. Set up a sequence for checking footage throughout the game or event. You don’t have to break away from the action every few minutes, but between quarters or during rest periods, go through a check-in that covers: - Lens clarity: Look for spots, fog, or any smudges- Camera angle: Make sure the perspective hasn’t shifted due to wind or movement- Stability: Double-check that the tripod or monopod is firmly grounded- Focus and exposure: Sharp focus and lighting might require tweaks as the sky changes Having an assistant or spotter comes in handy, especially during fast-moving situations. They can catch issues while you're focused on framing the shot. Even something as small as wind gusts rocking your tower can slowly shift your angle. A second set of eyes helps track that. Quick troubleshooting should also be part of your game plan. If the view suddenly goes blurry, don’t assume it’s fog. It could be a droplet or smear. If the camera reacts slowly to light changes, try manually adjusting instead of letting auto mode struggle. The more familiar you are with your gear, the quicker you’ll be at fixing issues mid-shoot without missing key footage. These same ideas apply whether you're filming youth football, a property walkthrough, or a high school drama performance outdoors under questionable skies. Any time you rely on tripod-mounted cameras in open-air environments, especially with elevated setups, small adjustments go a long way to keeping footage sharp. How to Stay Ready No Matter the Forecast There’s no perfect guard against rain, but combining the right equipment with smart handling goes a long way. Cameras can’t adapt to moisture on their own. The person behind the lens needs to work with the gear to get clean results. That starts with good prep, continues with steady monitoring, and ends with a game plan for weather changes. Learning to use covers, re-angled setups, and proper lens care doesn’t just benefit sports filming. The same approach is useful when you're covering an outdoor wedding, inspecting a worksite after a storm, or gathering promotional footage for a mobile food truck parked under gray skies. Keeping visuals clean becomes even more important when the shoot can’t be repeated. When you've set up the right way, protected your gear, and stayed on top of conditions throughout the film session, it shows in the final video. Clear visuals help tell a better story, whether you're sharing game highlights, reviewing play strategy, or creating a property preview reel. With unpredictable fall weather always a possibility, staying ready pays off across football fields, business locations, and event spaces alike. When you're ready to improve your video capture during unpredictable weather, it's important to consider the right equipment for the job. Discover how our range of gear can help enhance your recording experience, rain or shine, and take a look at our selection of football end zone cameras at Hi Rise Camera. With our expertise, you'll be able to secure consistently clear footage, no matter the conditions.
Maintaining Clear Shots During Rainy Game Days
Rainy game days throw a whole new challenge into the mix for those trying to capture clean, clear video footage. While a steady drizzle might not stop the action on the field, it can create real problems behind the camera. Rain affects visibility, focus, and lens clarity, which means all that effort to record the game can go to waste if water spots or fog start clouding the view. Football end zone cameras are designed to capture wide, elevated angles that give a better view of plays as they unfold. But when the weather turns, even the best camera setups need extra care. Whether you're filming high school teams, practice sessions, or weekend games, managing your camera and keeping the shot clear matters just as much as what's happening on the field. Rain doesn’t care about your schedule, so preparing ahead for wet conditions can save you headaches later. Understanding The Problem: Rainy Game Days Outdoor filming during fall brings on more than wind and cold. It’s also the season when unexpected rain can show up fast, right in the middle of your setup. What starts off as a light mist can turn into steady rain that blurs images, fogs lenses, and makes footage look messy. That means missed plays, lost angles, and unclear visuals when you go back to review the game. When filming with a football end zone camera, you're often dealing with zoom lenses and wide coverage. Even tiny water droplets on the lens can distort the image or blur motion. Fogged-up viewfinders and soaked housings don’t just mess with quality, they make it hard to keep up with fast-moving gameplay. And since the towers usually stand taller than you can reach without adjusting the entire frame, it helps to plan ahead. Common rain-related issues include: - Fogged lenses from temperature differences or moisture buildup- Water spots that distort image clarity or create glare- Raindrops pooling on lens covers or shields- Reduced visibility from poor lighting or heavy clouds One weekend, a youth football tournament ran into steady rain just before kickoff. The gear wasn’t fully covered, and after the first quarter, the lens was fogged over. The footage pulled from that game later was almost useless. You could see shapes, but not details. The team missed out on reviewing play positioning, and the parents didn’t get the clips they'd hoped to share. That kind of problem, once it happens, is hard to fix in editing. Working in unpredictable weather comes with added pressure, especially when recording long segments. If you wait until the rain starts to think about your setup, it’s usually too late. Thinking through what could go wrong and tackling that ahead of time makes a big difference. Essential Equipment For Rainy Conditions Having the right gear matters more when weather shifts quickly. A good end zone camera setup should already be designed to hold up outdoors, but when rain is in the forecast, you’ll want extra layers of protection. Water and optics don’t mix well. Your goal is to keep the lens dry, the camera body protected, and the footage as smooth as possible no matter what. Let’s look at a few key add-ons and features you’ll want: 1. Weather-Resistant Housing Cameras that sit up high are more exposed to wind and straight rainfall. A weather-resistant outer shell keeps water from reaching buttons, panels, or ports that could short out. Solid housings that fit tightly around your camera and offer proper airflow can also reduce fogging. 2. Clear Plastic Covers or Rain Shields These are helpful when placed over the lens area. A clear shield can block raindrops while still capturing clean video, and some designs include small hoods or angles to guide water away from the front of the lens. 3. Water-Repellent Lens Coatings Some lenses or filters come with water-repellent coatings already applied. They help cause rain droplets to slide off instead of sticking, which means fewer watermarks in the shot. These are useful for quick cleanup and can also reduce glare or cloudiness from moisture. 4. Waterproof Bags or Wraps Spare wraps and zippered covers are worth having on hand between games or during setup and breakdown. Even if your camera is weather-resistant, your hands, control devices, and supporting gear can benefit from extra coverage. Instead of scrambling with a towel when rain starts, it's better to have layers in place from the beginning. That way, your gear can focus on doing what it’s supposed to do, capturing every snap and movement from a sharp, elevated view. The fewer distractions and adjustments you need, the more consistent your footage will be, even with clouds hanging overhead. Tips For Maintaining Clear Shots When filming in damp conditions, it’s not just about having the right equipment. It’s how you use it that really makes the difference. The way the camera is set up, maintained during the game, and handled between quarters plays a big part in capturing usable footage. Simple actions at the right time can save hours of frustration later. Start with setup. Elevate the camera securely so that you can minimize unnecessary exposure to splashback from sideline puddles or crowded areas. It helps to tilt the lens slightly downward. This angle keeps raindrops from sitting directly on the lens and can cut down on the chances of fog building up from the inside. If your lens is exposed, think about using a rubber lens hood to act as a mini umbrella. It’s a small addition, but it guides water away with a lot less effort. During games, make it a habit to check the lens every time there’s a break in play. A quick look can usually tell you if there’s moisture buildup. Keep a microfiber cloth in a resealable pouch for safe, dry wiping. The cloth shouldn’t leave lint behind, and it won’t scratch your gear, even if you’re working fast. If your setup includes a monitor or wireless screen, keep that clean too. Being able to track the video quality in real-time gives you the chance to fix a problem before it turns into a full shot of cloudy blur. Wet hands and camera controls also don’t mix. Disposable gloves with grip or fingerless waterproof options can help you keep clicking and adjusting, even when the conditions are messy. For longer shoots like construction progress updates or extended school events, keeping moisture in check becomes something you plan into the whole timeline. Whether you're filming a sideline game or surveying a property development, these habits apply across the board and can give you cleaner, sharper end results. Effective Practices For Monitoring And Adjusting Staying alert during the recording process helps avoid surprises when you review the footage later. What worked at the start of the game might not hold up an hour in if the weather starts shifting. That’s where monitoring and quick adjustment can help you stay a step ahead of problems. Set up a sequence for checking footage throughout the game or event. You don’t have to break away from the action every few minutes, but between quarters or during rest periods, go through a check-in that covers: - Lens clarity: Look for spots, fog, or any smudges- Camera angle: Make sure the perspective hasn’t shifted due to wind or movement- Stability: Double-check that the tripod or monopod is firmly grounded- Focus and exposure: Sharp focus and lighting might require tweaks as the sky changes Having an assistant or spotter comes in handy, especially during fast-moving situations. They can catch issues while you're focused on framing the shot. Even something as small as wind gusts rocking your tower can slowly shift your angle. A second set of eyes helps track that. Quick troubleshooting should also be part of your game plan. If the view suddenly goes blurry, don’t assume it’s fog. It could be a droplet or smear. If the camera reacts slowly to light changes, try manually adjusting instead of letting auto mode struggle. The more familiar you are with your gear, the quicker you’ll be at fixing issues mid-shoot without missing key footage. These same ideas apply whether you're filming youth football, a property walkthrough, or a high school drama performance outdoors under questionable skies. Any time you rely on tripod-mounted cameras in open-air environments, especially with elevated setups, small adjustments go a long way to keeping footage sharp. How to Stay Ready No Matter the Forecast There’s no perfect guard against rain, but combining the right equipment with smart handling goes a long way. Cameras can’t adapt to moisture on their own. The person behind the lens needs to work with the gear to get clean results. That starts with good prep, continues with steady monitoring, and ends with a game plan for weather changes. Learning to use covers, re-angled setups, and proper lens care doesn’t just benefit sports filming. The same approach is useful when you're covering an outdoor wedding, inspecting a worksite after a storm, or gathering promotional footage for a mobile food truck parked under gray skies. Keeping visuals clean becomes even more important when the shoot can’t be repeated. When you've set up the right way, protected your gear, and stayed on top of conditions throughout the film session, it shows in the final video. Clear visuals help tell a better story, whether you're sharing game highlights, reviewing play strategy, or creating a property preview reel. With unpredictable fall weather always a possibility, staying ready pays off across football fields, business locations, and event spaces alike. When you're ready to improve your video capture during unpredictable weather, it's important to consider the right equipment for the job. Discover how our range of gear can help enhance your recording experience, rain or shine, and take a look at our selection of football end zone cameras at Hi Rise Camera. With our expertise, you'll be able to secure consistently clear footage, no matter the conditions.
Endzone Camera Blog

Adjusting Camera Height for Architectural Photo...
Architectural photography has always relied on a balance between creativity and perspective. Whether someone is capturing sweeping images of urban skyscrapers or the details of a single-family home, the angle and composition play a big role in its final look. One element that often gets overlooked by beginners is camera height. Adjusting the height can shift the look of a structure completely, making ordinary buildings pop and standout designs even more intriguing. Being able to change your shooting height also helps deal with lighting issues, weird shadows, or crowded surroundings. That’s where a telescoping camera mast comes in handy. These tools give photographers the height and flexibility required to capture cleaner shots from just about any angle. Whether shooting during the day, at dusk, or indoors with creative framing, getting the camera up higher offers new ways to show off architectural features from a cleaner, less obstructed viewpoint. Importance of Camera Height in Architectural Photography Getting the right height for each shot can completely change how viewers perceive a building. Shooting from a lower angle can exaggerate the height of a structure, while higher angles can reveal patterns in rooftops, courtyards, or street symmetry that just aren’t visible from the ground. Subtle changes in height often mean the difference between a dull snapshot and a compelling architectural photo. Without the ability to lift the camera to the proper level, certain problems tend to pop up: - Distorted building lines that lean or curve when shooting from too low- Obstructions like street signs, fences, or crowds that block clean framing- Missed features on upper levels like detailed windows, trim, or textures- Reflections from glass surfaces catching at odd angles One example of this is when shooting the courtyard of a modern office complex. From the ground, you end up with parked cars and trash bins sneaking into your frame. But raise the camera by ten or fifteen feet, and suddenly your shot shows well-balanced lines, landscaping symmetry, and the geometry of the space all without annoying distractions. Getting this right isn’t just about creativity. It's practical, too. Adjusting the camera’s height can help you deal with tough lighting angles or even position your lens away from busy walkways or roads. It gives you room to work with instead of being stuck to one fixed vantage point. Benefits of Using a Telescoping Camera Mast A telescoping camera mast is a pole that extends vertically to raise your camera above ground level. These masts are built for stability and can reach impressive heights while keeping your gear secure and steady. With the right setup, you can go from eye-level to rooftop views in just a few moves. There are a few big benefits to using one as part of your shoot setup: 1. Adjustable Height Move your camera up or down easily without needing ladders or scaffolding. 2. Stable Frame The added structure keeps your camera still, even in breezy conditions. 3. Compact Setup Many masts are portable, making them great for mobile photographers or small teams. 4. Versatile Use Works well for outdoor structures, interiors with high ceilings, or narrow spaces where traditional tripods might not fit. 5. Better Composition Control Offers more flexibility when framing vertical buildings or large areas. Using a telescoping camera mast isn’t just about reaching new heights. It’s about gaining quick control over your shots. Instead of moving around searching for open space, you get to stay in a good position and elevate the lens as needed. That’s especially helpful when working in tight cityscapes, rooftops, or populated areas where space is limited. Tips for Using a Telescoping Camera Mast Getting the most out of a telescoping camera mast starts with how you set it up. While the basic concept is straightforward, certain steps can help you avoid shaky footage or awkward angles. Good preparation and technique go a long way. Here’s a simple setup walkthrough to get you started: 1. Choose Your Surface Make sure the surface under the mast is level. Uneven ground can cause leaning or strain on the mast, especially when it's fully extended. 2. Secure the Base Use weighted stands or anchors if the mast stands on its own. If you're using a tripod-style base, double-check that all legs are fully extended and locked. 3. Attach the Camera Properly Use the correct mounting hardware. Quick-release plates or adjustable clamps make the connection sturdy and easier to adjust later. 4. Adjust Slowly Don’t raise the mast too quickly. Take your time to extend each section gradually and lock each one before moving to the next height. 5. Check for Movement Before recording or taking pictures, gently nudge the mast to see if there’s any unwanted sway. If so, lower it slightly or reinforce the base. If you're working inside, factor in the ceiling height and any hanging lighting or vents. Use a smaller extension range to stay safe and get the best composition. Outdoors, pay attention to wind, especially if you’re using a lightweight camera. A gust can knock things off balance if the mast isn’t steady. It helps to conduct a few test shots before committing to a long video or complex series of images. For example, someone filming a real estate property may need to switch quickly between indoor living spaces and outside front elevations. Keeping setup time short while still capturing those higher angles makes a big difference in how much coverage you can get in a limited time frame. Choosing the Right Telescoping Camera Mast Not all masts are made the same. Before grabbing the first one you find online, think about how and where you’ll be using it. Taller isn’t always better if the gear is too bulky or slow to set up. Match the height range, build quality, and portability to the kind of projects you shoot most often. Some important features to look for include: - Material Aluminum tends to be lighter, while steel offers more strength and stability. - Height Range Make sure the max height fits your shooting needs but don’t overlook the minimum height for indoor use. - Mounting Compatibility Check if it supports your current camera or video rig without needing extra parts. - Weight and Portability If you’re on the move, look for something you can carry and set up without help. - Locking System Twist locks, clamps, or push-pin systems all have pros and cons. Pick the one that feels the most natural for you to handle securely. Some masts are made more for still photography and simple framing, while others are built with features like powered elevation or remote tilt controls. Depending on your work, whether covering a corporate event, capturing hotel exteriors, or documenting renovations, you’ll want to choose something that reduces hassle and increases your freedom to shoot from any angle. Mastering Your Architectural Shots with Height Adjustments Camera height is one of those details that often gets missed but has a huge effect on the final shot. It changes the way buildings are viewed, controls lines and angles, and lets you manage crowded or tricky areas that could otherwise ruin a photo. Whether you're shooting a small office building or a large industrial facility, that extra height can help you frame each shot better and show the full story of the structure. Using a telescoping camera mast gives you the ability to capture those angles quickly and cleanly. It keeps you out of the way of foot traffic and provides a steady platform without needing complex equipment. It’s a smart way to balance flexibility with quality and adjust quickly as your perspective changes. Architectural work involves more than just pushing a button on the camera. Composing shots at the right height means thinking ahead, moving with purpose, and using tools that give you more control over the results. A good telescoping system lets you adjust easily, try different heights, and experiment until the shot feels just right. Whether you're building a portfolio or delivering images to a client, getting that perspective right can make all the difference. To take your architectural photography to new heights, explore our range of innovative solutions. With the right equipment, you can achieve the perfect shot every time. Discover the right telescoping camera mast to match your setups and elevate every angle with ease. At Hi Rise Camera, we're here to support your photographic journey with top-tier tools and expertise.
Adjusting Camera Height for Architectural Photography
Architectural photography has always relied on a balance between creativity and perspective. Whether someone is capturing sweeping images of urban skyscrapers or the details of a single-family home, the angle and composition play a big role in its final look. One element that often gets overlooked by beginners is camera height. Adjusting the height can shift the look of a structure completely, making ordinary buildings pop and standout designs even more intriguing. Being able to change your shooting height also helps deal with lighting issues, weird shadows, or crowded surroundings. That’s where a telescoping camera mast comes in handy. These tools give photographers the height and flexibility required to capture cleaner shots from just about any angle. Whether shooting during the day, at dusk, or indoors with creative framing, getting the camera up higher offers new ways to show off architectural features from a cleaner, less obstructed viewpoint. Importance of Camera Height in Architectural Photography Getting the right height for each shot can completely change how viewers perceive a building. Shooting from a lower angle can exaggerate the height of a structure, while higher angles can reveal patterns in rooftops, courtyards, or street symmetry that just aren’t visible from the ground. Subtle changes in height often mean the difference between a dull snapshot and a compelling architectural photo. Without the ability to lift the camera to the proper level, certain problems tend to pop up: - Distorted building lines that lean or curve when shooting from too low- Obstructions like street signs, fences, or crowds that block clean framing- Missed features on upper levels like detailed windows, trim, or textures- Reflections from glass surfaces catching at odd angles One example of this is when shooting the courtyard of a modern office complex. From the ground, you end up with parked cars and trash bins sneaking into your frame. But raise the camera by ten or fifteen feet, and suddenly your shot shows well-balanced lines, landscaping symmetry, and the geometry of the space all without annoying distractions. Getting this right isn’t just about creativity. It's practical, too. Adjusting the camera’s height can help you deal with tough lighting angles or even position your lens away from busy walkways or roads. It gives you room to work with instead of being stuck to one fixed vantage point. Benefits of Using a Telescoping Camera Mast A telescoping camera mast is a pole that extends vertically to raise your camera above ground level. These masts are built for stability and can reach impressive heights while keeping your gear secure and steady. With the right setup, you can go from eye-level to rooftop views in just a few moves. There are a few big benefits to using one as part of your shoot setup: 1. Adjustable Height Move your camera up or down easily without needing ladders or scaffolding. 2. Stable Frame The added structure keeps your camera still, even in breezy conditions. 3. Compact Setup Many masts are portable, making them great for mobile photographers or small teams. 4. Versatile Use Works well for outdoor structures, interiors with high ceilings, or narrow spaces where traditional tripods might not fit. 5. Better Composition Control Offers more flexibility when framing vertical buildings or large areas. Using a telescoping camera mast isn’t just about reaching new heights. It’s about gaining quick control over your shots. Instead of moving around searching for open space, you get to stay in a good position and elevate the lens as needed. That’s especially helpful when working in tight cityscapes, rooftops, or populated areas where space is limited. Tips for Using a Telescoping Camera Mast Getting the most out of a telescoping camera mast starts with how you set it up. While the basic concept is straightforward, certain steps can help you avoid shaky footage or awkward angles. Good preparation and technique go a long way. Here’s a simple setup walkthrough to get you started: 1. Choose Your Surface Make sure the surface under the mast is level. Uneven ground can cause leaning or strain on the mast, especially when it's fully extended. 2. Secure the Base Use weighted stands or anchors if the mast stands on its own. If you're using a tripod-style base, double-check that all legs are fully extended and locked. 3. Attach the Camera Properly Use the correct mounting hardware. Quick-release plates or adjustable clamps make the connection sturdy and easier to adjust later. 4. Adjust Slowly Don’t raise the mast too quickly. Take your time to extend each section gradually and lock each one before moving to the next height. 5. Check for Movement Before recording or taking pictures, gently nudge the mast to see if there’s any unwanted sway. If so, lower it slightly or reinforce the base. If you're working inside, factor in the ceiling height and any hanging lighting or vents. Use a smaller extension range to stay safe and get the best composition. Outdoors, pay attention to wind, especially if you’re using a lightweight camera. A gust can knock things off balance if the mast isn’t steady. It helps to conduct a few test shots before committing to a long video or complex series of images. For example, someone filming a real estate property may need to switch quickly between indoor living spaces and outside front elevations. Keeping setup time short while still capturing those higher angles makes a big difference in how much coverage you can get in a limited time frame. Choosing the Right Telescoping Camera Mast Not all masts are made the same. Before grabbing the first one you find online, think about how and where you’ll be using it. Taller isn’t always better if the gear is too bulky or slow to set up. Match the height range, build quality, and portability to the kind of projects you shoot most often. Some important features to look for include: - Material Aluminum tends to be lighter, while steel offers more strength and stability. - Height Range Make sure the max height fits your shooting needs but don’t overlook the minimum height for indoor use. - Mounting Compatibility Check if it supports your current camera or video rig without needing extra parts. - Weight and Portability If you’re on the move, look for something you can carry and set up without help. - Locking System Twist locks, clamps, or push-pin systems all have pros and cons. Pick the one that feels the most natural for you to handle securely. Some masts are made more for still photography and simple framing, while others are built with features like powered elevation or remote tilt controls. Depending on your work, whether covering a corporate event, capturing hotel exteriors, or documenting renovations, you’ll want to choose something that reduces hassle and increases your freedom to shoot from any angle. Mastering Your Architectural Shots with Height Adjustments Camera height is one of those details that often gets missed but has a huge effect on the final shot. It changes the way buildings are viewed, controls lines and angles, and lets you manage crowded or tricky areas that could otherwise ruin a photo. Whether you're shooting a small office building or a large industrial facility, that extra height can help you frame each shot better and show the full story of the structure. Using a telescoping camera mast gives you the ability to capture those angles quickly and cleanly. It keeps you out of the way of foot traffic and provides a steady platform without needing complex equipment. It’s a smart way to balance flexibility with quality and adjust quickly as your perspective changes. Architectural work involves more than just pushing a button on the camera. Composing shots at the right height means thinking ahead, moving with purpose, and using tools that give you more control over the results. A good telescoping system lets you adjust easily, try different heights, and experiment until the shot feels just right. Whether you're building a portfolio or delivering images to a client, getting that perspective right can make all the difference. To take your architectural photography to new heights, explore our range of innovative solutions. With the right equipment, you can achieve the perfect shot every time. Discover the right telescoping camera mast to match your setups and elevate every angle with ease. At Hi Rise Camera, we're here to support your photographic journey with top-tier tools and expertise.
Endzone Camera Blog
Low Light Solutions for Wedding Ceremony Recording
Wedding ceremonies usually happen in dreamy, scenic locations, many during sunset or indoors with candles and string lights as decorations. While these settings create an unforgettable experience, low light can make things hard when it comes to filming. A lot of video setups aren’t built to handle dim environments very well, and that leads to grainy or dark footage that doesn’t do justice to the moment. When the lighting goes down, so does the video quality unless you have the right equipment. That’s where the best wedding videography equipment steps in. High-end gear built to thrive in low light helps capture everything from subtle facial expressions to twinkling decorative lights without turning the footage into a blurry mess. Whether you're filming a candlelit vow exchange or the first dance under string lights, the right tools can make a huge difference in how the memories are preserved. Understanding what causes poor-quality video in these situations is the first step toward fixing the problem. Understanding Low Light Challenges Recording in low light isn’t just about brightness. It's about how your equipment reacts when the natural or available light is limited. Most standard cameras will try to compensate, but without the right settings or gear, the final video ends up looking washed out, discolored, or just plain fuzzy. One common issue is image noise, which shows up as strange fuzzy dots or static that seem to take over the screen. Another problem is motion blur. In low light, the camera might use a slower shutter speed, which causes movement to smear across the video. This makes it hard to capture things like walking down the aisle or clapping during a speech. Shadows can also become more intense and unpredictable. You might have good lighting in one corner of the room, but people in the background could be completely hidden if the light source isn’t strong or wide enough. When colors aren’t accurate, the footage can lose a lot of emotion and visual impact. All these problems make it tough to capture and relive those important wedding day moments. Take a ceremony in a dimly lit old church, for example. The ambience is beautiful, but the lighting wasn’t designed with filming in mind. Every movement turns slightly blurry, and the colors look flat and dull in playback. That’s not because the moment wasn’t magical—it’s because the gear wasn’t suited for the environment. These issues can pile up if the videographer isn’t ready to adjust for poor lighting, deep shadows, or rapidly changing conditions. Getting clean, vibrant footage in these situations starts with having the right gear. Features To Look For In Low Light Videography Equipment To avoid dealing with frustrating footage, it pays to know what features allow a camera to do well in low light. These are some of the things that really help: - Large sensors: A bigger sensor collects more light even when it’s limited. That results in clearer and brighter images with more accurate color.- Wide aperture lenses: Lenses with low f-stop numbers like f/1.4 or f/2.0 pull in more light. They also create a nice background blur while keeping the subject in focus.- Good image stabilization: When the shutter slows down in low light, even small movement can create a shaky video. Stabilization keeps the footage smooth even if the camera isn’t on a tripod.- High ISO range: ISO controls how sensitive your camera is to light. A powerful ISO range lets you shoot in darker areas, as long as the camera handles the higher settings without getting overly noisy.- Low light video modes or presets: Some video gear includes dedicated settings for poorly lit areas, which can be helpful when time is limited.- Strong noise reduction: Cameras that can clean up or reduce noise while filming can produce noticeably better clips in dark spaces. When these features come together, they allow your camera setup to shift with the light. Whether you're moving from a sunny garden ceremony to a dim reception hall, you won’t lose detail or color accuracy. Best Practices For Shooting Wedding Ceremonies In Low Light Even with the right gear, how you shoot still matters. Start by looking at where the light is and how it moves throughout the space. Set your camera so it uses whatever light you have in the best way possible. Placing your subjects with some light hitting them from the front or at an angle can bring out facial expressions without casting harsh shadows. Avoid backlighting unless you’re going for a specific effect. In darker indoor spots or outdoor nighttime receptions, extra lighting helps a lot. LED panels, clip-on lights, or other soft fills can make a big difference without ruining the atmosphere. Since many venues aim for a cozy or romantic look, these lights should be subtle and directional. The goal is to fill in the shadows just enough to keep faces and details visible. Three settings help you get the most out of your camera: 1. Adjust your ISO with care. Raise it as needed, but stop before the image starts to look grainy.2. Use manual exposure settings. Cameras often misread tricky lighting, especially if it changes quickly. Taking control of the exposure gives you a steady, natural look across the footage.3. Set white balance manually. Many lights found at venues can give off yellow or orange tints. Adjusting the balance makes sure skin tones and décor look natural. As an extra tip, using a tall tripod or monopod can really help during group shots or important moments. When your camera sits above eye level, it can catch more of the overhead lights from chandeliers or string lights. It also keeps your view clear if a crowd forms. Enhancing Low Light Videos With Post-Production Even with planning and the right tools, some footage still comes out a bit too dark or noisy. That’s where editing comes in. With today’s software, you get a second chance to make things right. Begin with color correction. Adjust basic things like brightness, contrast, and hue until the image looks fresh and appealing. It’s easy to go too far, so be gentle with the sliders. A small lift in shadow levels or just a bit of extra contrast can enhance a shot without making it look fake or over-processed. Next, apply noise reduction. Most editing software includes this. Keep it light so you don’t make people look too smooth or remove important details. Light sharpening can also help bring out edges and facial features. Try adding soft light filters or warming overlays if the footage still feels flat. These can bring up brightness and help balance multiple clips, especially when the lighting changes fast between locations. One example is a couple's nighttime sparkler exit. It was filmed with barely any extra lighting and looked too dark in the raw clips. But some post-production work—fixing the white balance, lifting midtones, and cleaning up grain—turned it into a usable memory that matched the feel of the moment. Editing can't do everything, but when used smartly, it can save clips you thought were bad and polish the ones that are already decent. Helping Couples Relive Their Perfect Night Planning for low light filming goes beyond packing a few extra lights. It's about being ready to adapt, and that starts with the right tools. Whether it's an indoor ceremony, evening toast, or a dramatic sparkler send-off outdoors, the best wedding videography equipment helps you stay ready. It could be a sharp lens that brings out small details, a camera that minimizes noise at high ISO, or a sturdy, tall tripod that provides the perfect view. What matters is having quality gear that supports your ability to catch clear, emotional moments. When everything is set up right—from the angle you shoot to the post-editing tweaks—you can focus on telling the story of the couple’s day clearly and beautifully. With the right equipment and a thoughtful approach, their wedding memories will be as vivid in video as they were in person. To capture every cherished moment with clarity and brilliance, make sure you're working with the best wedding videography equipment for low light conditions and everything in between. Explore Hi Rise Camera's wide range of reliable, high-angle gear designed to help you film with confidence in any environment by finding what works best for you with our best wedding videography equipment.
Low Light Solutions for Wedding Ceremony Recording
Wedding ceremonies usually happen in dreamy, scenic locations, many during sunset or indoors with candles and string lights as decorations. While these settings create an unforgettable experience, low light can make things hard when it comes to filming. A lot of video setups aren’t built to handle dim environments very well, and that leads to grainy or dark footage that doesn’t do justice to the moment. When the lighting goes down, so does the video quality unless you have the right equipment. That’s where the best wedding videography equipment steps in. High-end gear built to thrive in low light helps capture everything from subtle facial expressions to twinkling decorative lights without turning the footage into a blurry mess. Whether you're filming a candlelit vow exchange or the first dance under string lights, the right tools can make a huge difference in how the memories are preserved. Understanding what causes poor-quality video in these situations is the first step toward fixing the problem. Understanding Low Light Challenges Recording in low light isn’t just about brightness. It's about how your equipment reacts when the natural or available light is limited. Most standard cameras will try to compensate, but without the right settings or gear, the final video ends up looking washed out, discolored, or just plain fuzzy. One common issue is image noise, which shows up as strange fuzzy dots or static that seem to take over the screen. Another problem is motion blur. In low light, the camera might use a slower shutter speed, which causes movement to smear across the video. This makes it hard to capture things like walking down the aisle or clapping during a speech. Shadows can also become more intense and unpredictable. You might have good lighting in one corner of the room, but people in the background could be completely hidden if the light source isn’t strong or wide enough. When colors aren’t accurate, the footage can lose a lot of emotion and visual impact. All these problems make it tough to capture and relive those important wedding day moments. Take a ceremony in a dimly lit old church, for example. The ambience is beautiful, but the lighting wasn’t designed with filming in mind. Every movement turns slightly blurry, and the colors look flat and dull in playback. That’s not because the moment wasn’t magical—it’s because the gear wasn’t suited for the environment. These issues can pile up if the videographer isn’t ready to adjust for poor lighting, deep shadows, or rapidly changing conditions. Getting clean, vibrant footage in these situations starts with having the right gear. Features To Look For In Low Light Videography Equipment To avoid dealing with frustrating footage, it pays to know what features allow a camera to do well in low light. These are some of the things that really help: - Large sensors: A bigger sensor collects more light even when it’s limited. That results in clearer and brighter images with more accurate color.- Wide aperture lenses: Lenses with low f-stop numbers like f/1.4 or f/2.0 pull in more light. They also create a nice background blur while keeping the subject in focus.- Good image stabilization: When the shutter slows down in low light, even small movement can create a shaky video. Stabilization keeps the footage smooth even if the camera isn’t on a tripod.- High ISO range: ISO controls how sensitive your camera is to light. A powerful ISO range lets you shoot in darker areas, as long as the camera handles the higher settings without getting overly noisy.- Low light video modes or presets: Some video gear includes dedicated settings for poorly lit areas, which can be helpful when time is limited.- Strong noise reduction: Cameras that can clean up or reduce noise while filming can produce noticeably better clips in dark spaces. When these features come together, they allow your camera setup to shift with the light. Whether you're moving from a sunny garden ceremony to a dim reception hall, you won’t lose detail or color accuracy. Best Practices For Shooting Wedding Ceremonies In Low Light Even with the right gear, how you shoot still matters. Start by looking at where the light is and how it moves throughout the space. Set your camera so it uses whatever light you have in the best way possible. Placing your subjects with some light hitting them from the front or at an angle can bring out facial expressions without casting harsh shadows. Avoid backlighting unless you’re going for a specific effect. In darker indoor spots or outdoor nighttime receptions, extra lighting helps a lot. LED panels, clip-on lights, or other soft fills can make a big difference without ruining the atmosphere. Since many venues aim for a cozy or romantic look, these lights should be subtle and directional. The goal is to fill in the shadows just enough to keep faces and details visible. Three settings help you get the most out of your camera: 1. Adjust your ISO with care. Raise it as needed, but stop before the image starts to look grainy.2. Use manual exposure settings. Cameras often misread tricky lighting, especially if it changes quickly. Taking control of the exposure gives you a steady, natural look across the footage.3. Set white balance manually. Many lights found at venues can give off yellow or orange tints. Adjusting the balance makes sure skin tones and décor look natural. As an extra tip, using a tall tripod or monopod can really help during group shots or important moments. When your camera sits above eye level, it can catch more of the overhead lights from chandeliers or string lights. It also keeps your view clear if a crowd forms. Enhancing Low Light Videos With Post-Production Even with planning and the right tools, some footage still comes out a bit too dark or noisy. That’s where editing comes in. With today’s software, you get a second chance to make things right. Begin with color correction. Adjust basic things like brightness, contrast, and hue until the image looks fresh and appealing. It’s easy to go too far, so be gentle with the sliders. A small lift in shadow levels or just a bit of extra contrast can enhance a shot without making it look fake or over-processed. Next, apply noise reduction. Most editing software includes this. Keep it light so you don’t make people look too smooth or remove important details. Light sharpening can also help bring out edges and facial features. Try adding soft light filters or warming overlays if the footage still feels flat. These can bring up brightness and help balance multiple clips, especially when the lighting changes fast between locations. One example is a couple's nighttime sparkler exit. It was filmed with barely any extra lighting and looked too dark in the raw clips. But some post-production work—fixing the white balance, lifting midtones, and cleaning up grain—turned it into a usable memory that matched the feel of the moment. Editing can't do everything, but when used smartly, it can save clips you thought were bad and polish the ones that are already decent. Helping Couples Relive Their Perfect Night Planning for low light filming goes beyond packing a few extra lights. It's about being ready to adapt, and that starts with the right tools. Whether it's an indoor ceremony, evening toast, or a dramatic sparkler send-off outdoors, the best wedding videography equipment helps you stay ready. It could be a sharp lens that brings out small details, a camera that minimizes noise at high ISO, or a sturdy, tall tripod that provides the perfect view. What matters is having quality gear that supports your ability to catch clear, emotional moments. When everything is set up right—from the angle you shoot to the post-editing tweaks—you can focus on telling the story of the couple’s day clearly and beautifully. With the right equipment and a thoughtful approach, their wedding memories will be as vivid in video as they were in person. To capture every cherished moment with clarity and brilliance, make sure you're working with the best wedding videography equipment for low light conditions and everything in between. Explore Hi Rise Camera's wide range of reliable, high-angle gear designed to help you film with confidence in any environment by finding what works best for you with our best wedding videography equipment.